How to Install Plone 6.0.4 Classic Using Plone Installer for Ubuntu.

Plone, a robust and flexible Content Management System (CMS), empowers users to build powerful websites and applications. Installing Plone, however, can sometimes be a heavy task for beginners. Fortunately, Cybrosys has developed the Plone Installer, a tool that streamlines the installation process and makes it hassle-free. In this article, we will guide you through the steps to install Plone 6.0.4 Classic using the Plone Installer.
This software is designed to work exclusively on apt-based Linux distributions, including Debian, Ubuntu, and their derivatives. This installer requires a window manager , Compatibility with other Linux distributions cannot be guaranteed.
Step 1: Download the installer
Begin by downloading the Plone Installer. Open your terminal or command prompt and enter the following command:
wget https://github.com/cybrosystech/Plone-CMS/raw/main/Plone-6.0.4-Unified-Installer/Plone-6.0.4-Unified-InstallerStep 2: Grant Execute Permissions:
Next, we need to grant execute permissions to the installer file. This allows the system to execute the installer properly. Use the following command:
chmod +x Plone-6.0.4-Unified-Installer
Step 3: Launch the Plone Installer:
After, Granting the execute permission, we can close the terminal and double click to open the installer.
Step 4: Once the installer opens, you’ll be greeted by a welcome screen. From here, click on the next button.

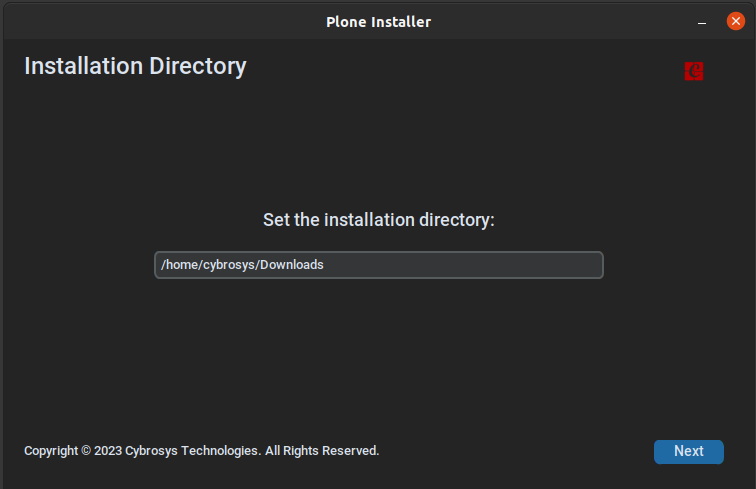
Step 5: Set the Installation directory in which Plone is to be installed.
Specify the directory where you want to install Plone. You can either use the default location or choose a custom directory. Note that administrative privileges are required to install in system directories. Also, try to avoid whitespaces in the directory name, which may cause issues in the buildout process.
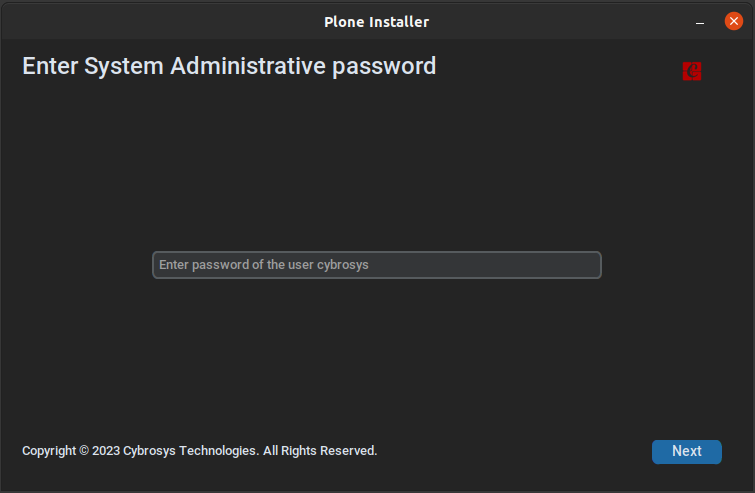
Step 6: Enter the System user password
Enter your system user password to allow the installer to execute commands with administrative privileges which is required to install some packages to run plone smoothly.
Step 7: Enter the administrative password for your Plone instance
Provide an administrative password for your Plone instance. This password will be used to manage your Plone CMS.

Step 8: The installation process.
The installation process will now commence, which may take approximately 10 to 25 minutes. Please be patient during this step and make sure that the internet connection is stable during the process.

Once the installation is complete, you will receive a confirmation message. Please go through the instructions, and if you have any dependency error when running the Plone Instance, make sure you have done the buildout process by executing the ./bin/buildout in the terminal. Also, make sure you are in the Plone-installed directory.
Congratulations! Plone 6.0.4 Classic is now successfully installed on your system.

Step 9: Accessing Plone:
To access your Plone instance, open your terminal or command prompt and navigate to the directory where the Plone instance is created. Then, execute the following commands:
./bin/buildout
./bin/instance start
After executing the commands, your Plone instance will be up and running. You can access it by opening a web browser and navigating to http://localhost:8080/.
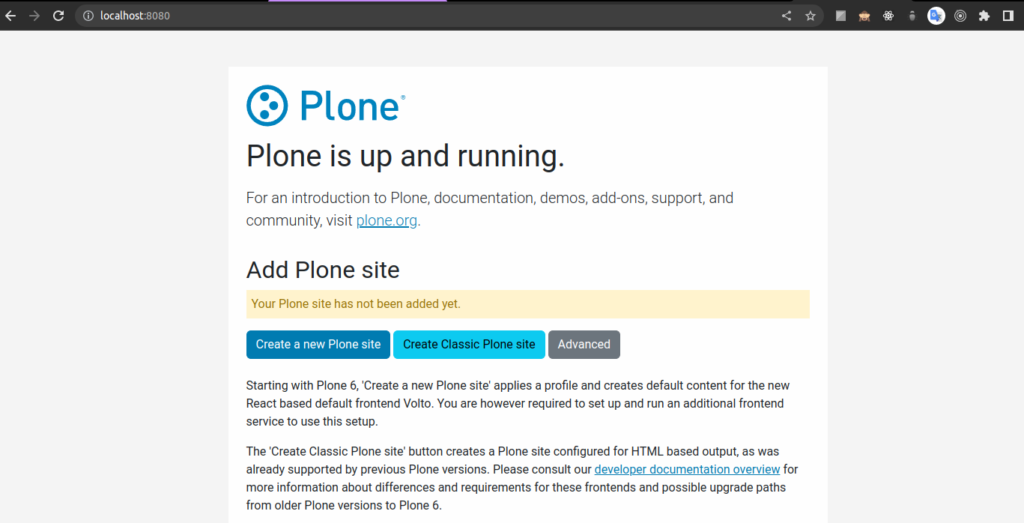
With the help of the Plone Installer developed by Cybrosys, installing Plone 6.0.4 Classic has become a hassle-free process. By following the step-by-step guide in this article, you can easily set up Plone on your system and begin leveraging its powerful features to create and manage content-rich websites and applications. Enjoy exploring the capabilities of Plone and unlock new possibilities for your online presence.